


The Polar Express Diorama & Christmas Blessing Giveaway
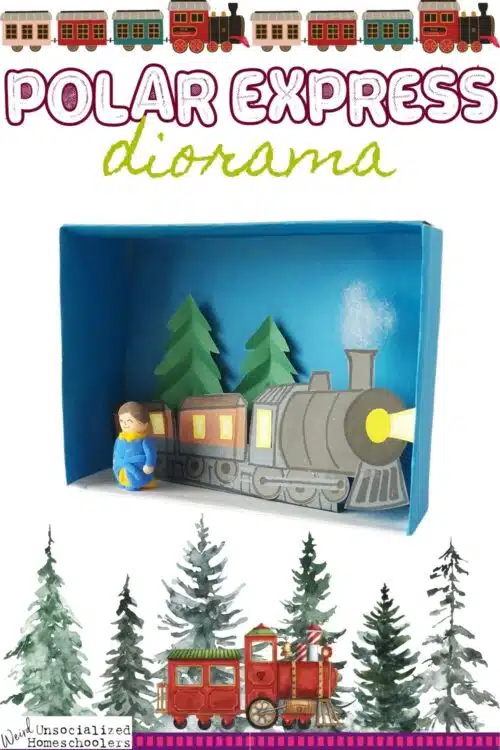
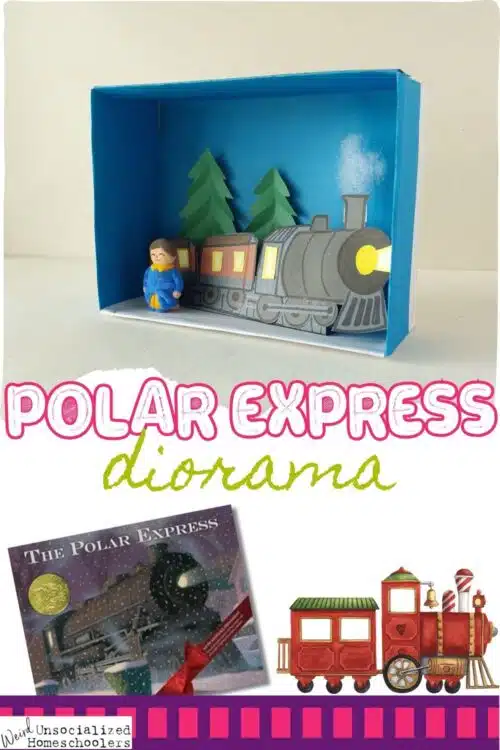
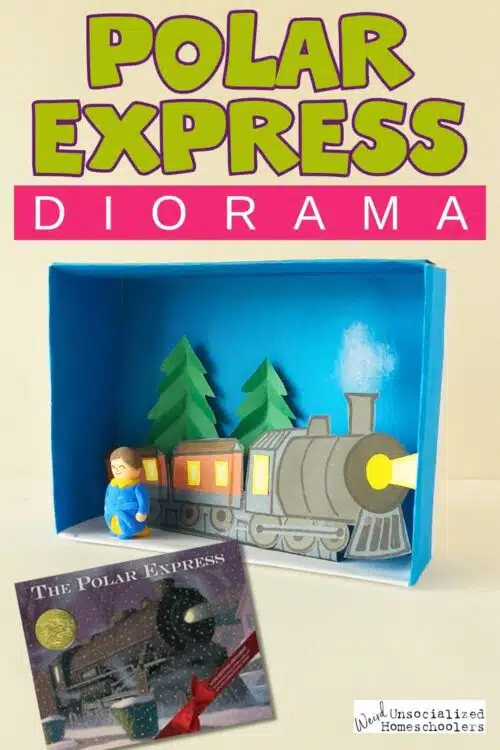
All Aboard: Exploring The Polar Express with Hands-On Creativity!
It’s officially Polar Express season—when cocoa flows freely, cardboard turns into magic, and a simple homeschool day can feel like a scene straight out of the book. Today’s Polar Express Diorama is one of those memory-makers your kids will talk about for years.

And because Christmas is all about blessing one another, I’ve teamed up with a wonderful group of bloggers for a Christmas Blessings Giveaway! We’re giving away FOUR $250 gift cards, and each winner gets to choose where theirs comes from.
All the details and the entry form are waiting for you at the bottom of this post—so be sure to scroll down and enter before it ends!

Now… let’s build something magical.
Growing up, an annual reading of The Polar Express was a Christmas tradition for me. Now that I have kids of my own, it is so much fun to share this story with them in our home (and being homeschoolers, in our “school,” too!)
Written and illustrated by Chris Van Allsburg, this beloved Christmas story is a magical tale about a young boy’s journey to the North Pole aboard a train that shows up at his house after dark. Combined with its mysterious and magical illustrations, the book’s themes of belief, wonder, and the magic of Christmas have captivated young readers since 1985! My children have already read it multiple times this year, attesting to the story’s ability to withstand the test of time.
This wondrous Christmas story also offers an opportunity to bring literature to life through hands-on activities, especially if you homeschool and are looking for some fun ways to engage with books during the holiday season! Today, we’ve got a fun craft to go with this book: a Polar Express diorama.
In this post, you’ll find step-by-step instructions and a free template to build your own paper model of this famous Christmas train. And of course, we’re also including plenty of other fun and simple ideas for the whole family to enjoy some hands-on learning with this Christmas classic!
The Story of The Polar Express
If you don’t already have your copy of The Polar Express on standby, let’s refresh! The story follows a young boy who, on Christmas Eve, boards a train bound for the North Pole. Along the way, he meets other children, drinks some amazing hot chocolate, marvels at the wonders of the journey, and ultimately receives a very special gift: a silver bell from Santa’s sleigh. The boy treasures the bell, which rings only for those who truly believe in the magic of Christmas.
The story’s timeless message about childlike belief, paired with Van Allsburg’s stunning illustrations, makes it a favorite for families everywhere during the holiday season. Even though it’s approachable for young children, this book is also one that older kids can read and enjoy. Today, we’re sharing instructions (and a template) for a diorama that brings The Polar Express to life, as well as several other simple, hands-on activities to make Christmas memories and provide some fun engagement with this book.
Don’t Miss the Christmas Blessing Giveaway Below!
Why Make a Polar Express Diorama?
Dioramas are a fantastic way to bring literature to life. They allow children to put themselves into the story, visualize key moments, and express their creativity. Crafting a diorama is a multi-sensory, hands-on learning experience that can help a child develop fine motor skills. It also encourages teamwork and following instructions, and fosters a deeper connection to the story.
Lastly, it creates a visual that will remind them of their reading adventure (and this time of year can double as Christmas decor!)
Hands-on activities like dioramas are especially perfect during the holiday season. They offer an opportunity for families to slow down, bond over a creative project, and fully immerse themselves in the magic of Christmas. They also offer various tasks that can be collaborated on by most ages. By encouraging children to bring the story to life through art and imagination, you’re fostering a love for reading as well as enthusiasm for learning and creativity.
Scroll down to get straight to the diorama, or keep reading for some other fun ways to extend this classic Christmas story!
The Polar Express Activities for All Ages
Reading and Discussion (All Ages)
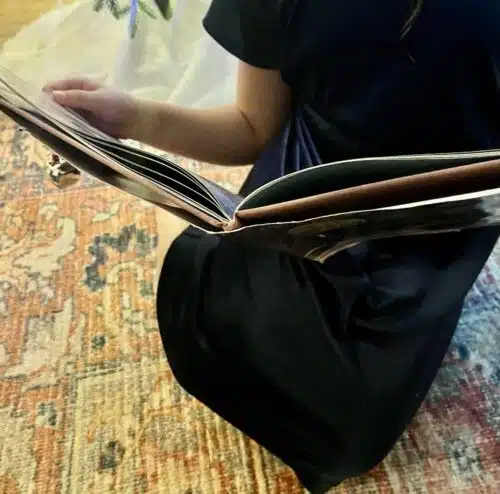
Read The Polar Express aloud as a family and talk about the story’s meaning. What does the bell symbolize? How does the boy’s belief in magic change throughout the story? Encourage everyone to share their thoughts, over a cup of hot chocolate, of course (it is impossible to read this book without wanting hot chocolate).
Creative Writing and Art (All Ages)
Prompt older children write a journal entry from the perspective of the boy, describing his feelings during the journey. You could ask them to focus on one part of the journey in particular, adding more details to that scene.
Younger children can draw a picture of their favorite part of the story, including themselves in it! Have them tell you why they would have enjoyed this part the most.
Learn More about Trains (All Ages)
Explore the science behind steam engines, like the one in The Polar Express. For example, you could watch a video or conduct a simple experiment with steam to demonstrate how trains worked in the past. Alternatively, could watch videos about the history of trains and how this impacted history in general. This can be catered to different ages and levels, but it definitely provides an opportunity to study trains, which have been important parts of both science and history (and which most kids seem to love).
Christmas Snacks (All Ages):
- Serve hot cocoa and cookies during story time, just like the children enjoy on the train.
- Make bell-shaped sugar cookies to tie into the story’s theme. You can use any simple cut-out sugar cookie recipe that you like. If you’re gluten-free, like I am, I suggest this one.
Simple Bell Ornament Craft (All Ages):
The magical bell at the end of The Polar Express always appeals to kids, and it’s easy to make your own bell ornament! This quick and easy activity is perfect for all ages and adds a special touch to your Christmas tree. Simply pick out a ribbon that you like and get some jingle bells. Thread the ribbon through and tie it in a knot! This is an ornament that you can pull out every time you read the book! (Can everyone hear it? That means everyone believes!)
The Polar Express Diorama
Are you ready to learn how to make The Polar Express Diorama? While I encourage you to make this project your own in whatever way you like, our template and supply list/instructions offer a great place to start! Here’s what you’ll need:
List of Supplies
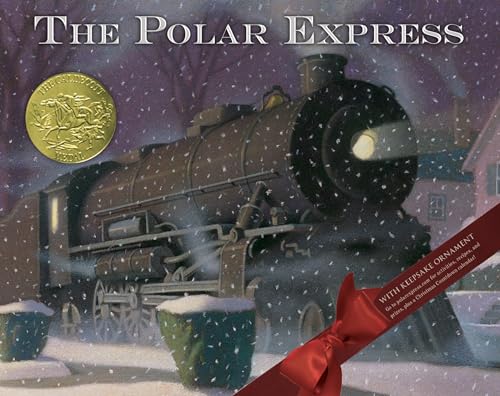
This beautiful hardcover edition of The Polar Express is the perfect gift for all those—of any age—who believe, come Christmas Eve, that they too will hear the sweet sound of a reindeer’s silver bell. This edition includes a keepsake ornament.
A young boy, lying awake one Christmas Eve, is welcomed aboard a magical train to the North Pole . . .
Through dark forests, over tall mountains, and across a barren desert of ice, the Polar Express makes its way to the huge city standing alone at the top of the world, where the boy will make his Christmas wish.
For millions of readers around the world, this mysterious journey to the North Pole has become a beloved Christmas classic. In this thirtieth-anniversary edition, the inimitable artistry of Chris Van Allsburg is showcased with a bold new jacket design and expanded interior layout.
The Polar Express is a Caldecott Medal winner, and reading the story together is a beloved holiday tradition held by generations of families. It has also become a favorite holiday movie and been translated into stage productions that take place across the United States during the holiday season.
Polar Express Diorama Draft
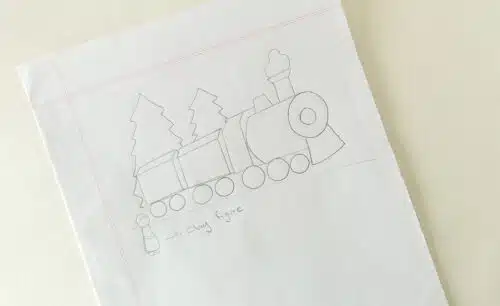
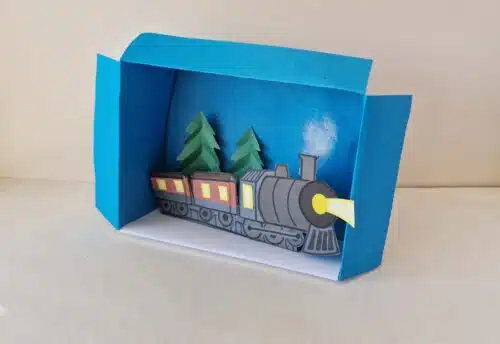
The scene we have selected for this project shows The Polar Express traveling through a forest of fir trees late at night! Children will love getting to build their own train for this project!
Instructions
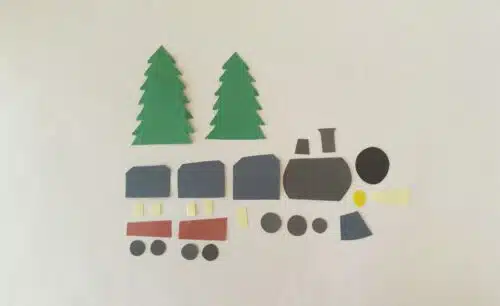
Step 1
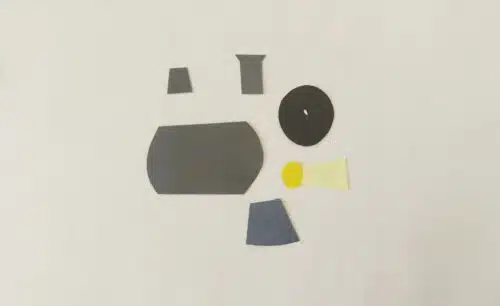
Download the template and trace the patterns for all of the train parts and the trees onto construction paper in the colors shown. Cut out the traced patterns using scissors. (The template includes patterns for the train and a tree.)
Step 2
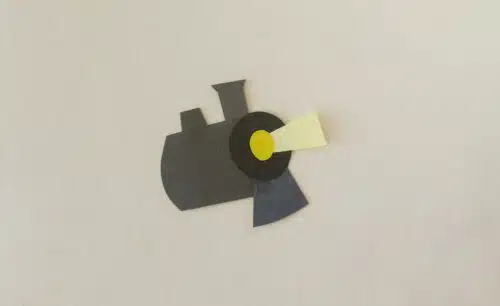
Gather the patterns for the smokebox part of the train. Attach the small oval cutout (yellow headlight) to the trapezoid cutout (yellow light ray coming out of the headlight).
Step 3
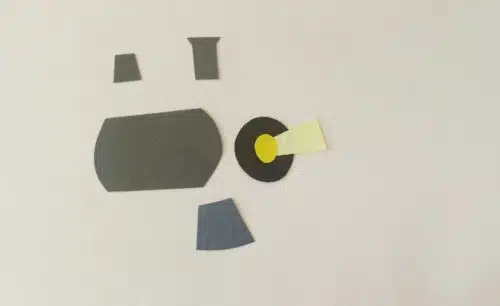
Attach the light pattern to the big round cutout (which makes up the front part of the smokebox).
Step 4
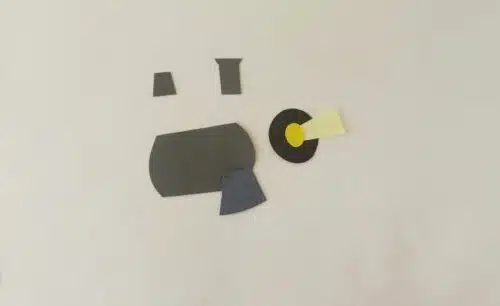
Attach the “pilot” cutout to the bottom of the train’s smokebox cutout.
Step 5
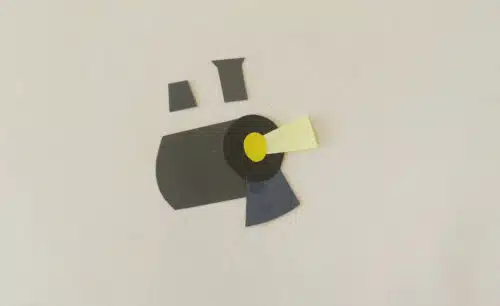
Attach the front part (with the light attached) that you’ve been working on to the front of the cylinder cutout that makes up the rest of the train’s smokebox.
Step 6
Attach the chimney cutouts to the top of the smokebox.
Step 7
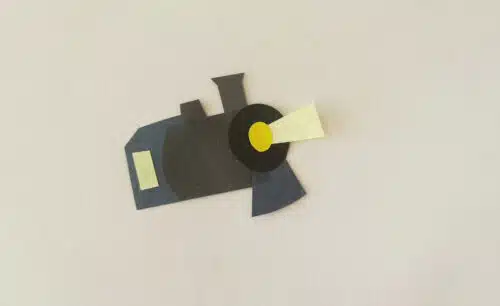
Attach the back of the smokebox (with a window glued on).
Step 8
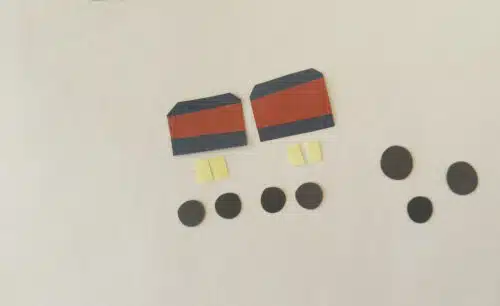
Take the train car cutouts and attach the red stripes along the middle of them.
Step 9
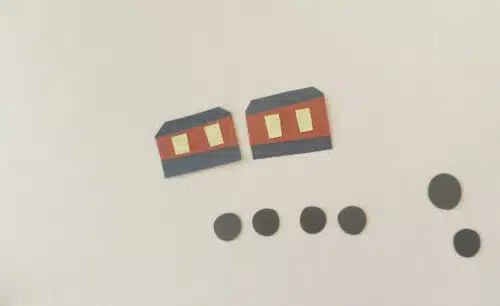
Attach the window cutouts to the red stripe.
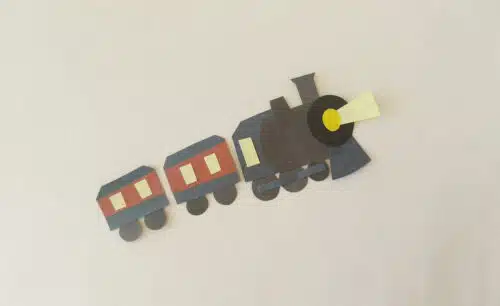
Step 10
Attach the wheel cutouts to the bottom of the train cars and smokebox.
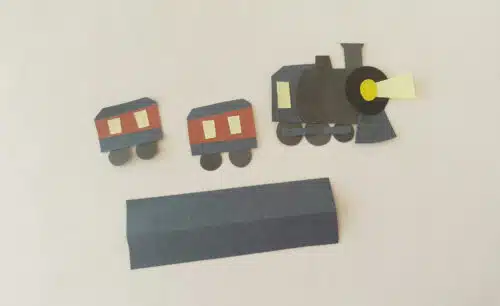
Step 11
Trace and cut out the strip from the same-colored (black) construction paper used for the train. Fold it in half, lengthwise. This will help your train “stand” in the diorama, giving it a more 3D look.
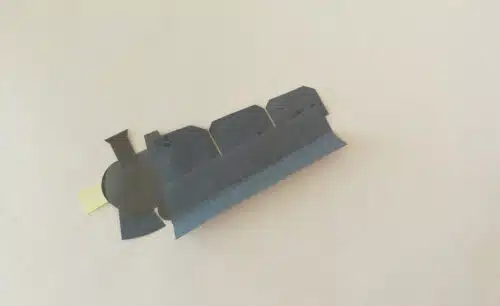
Step 12
Apply glue along a half side and attach the wheels of the train on the glued part.
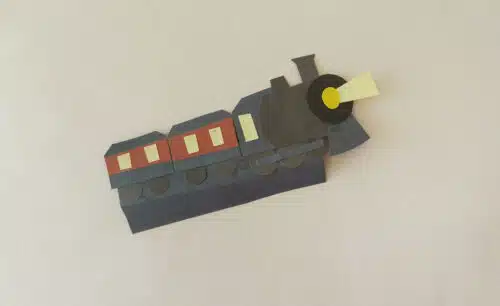
Step 13
At this point, this is what your train should look like from the front.
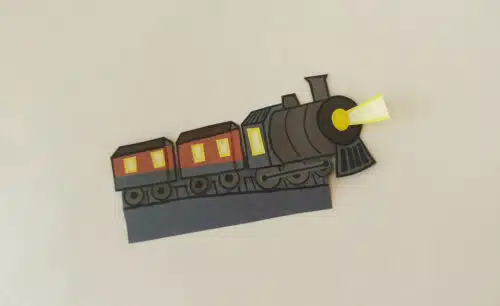
Step 14
Use a permanent marker to draw outlines on the train parts to give it a more finished look.
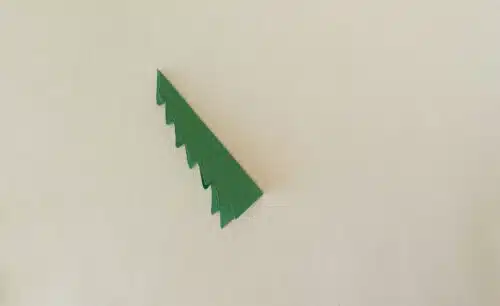
Step 15
Take the tree cutouts and fold each tree in half, vertically.
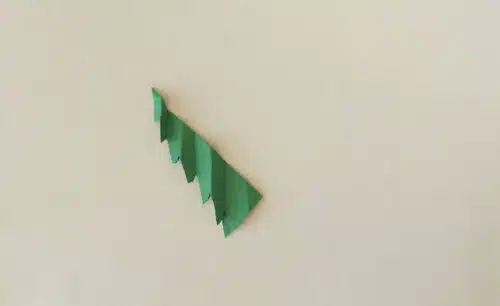
Step 16
Make slightly diagonal accordion folds on the half-folded tree.
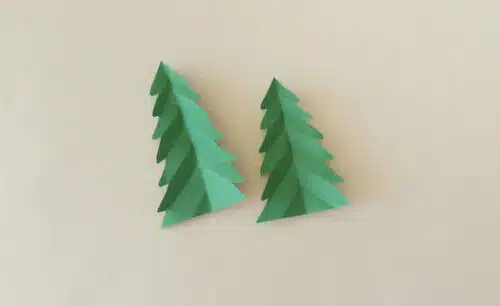
Step 17
Unfold all the folds. This will leave nice creases on the paper trees and give them depth!
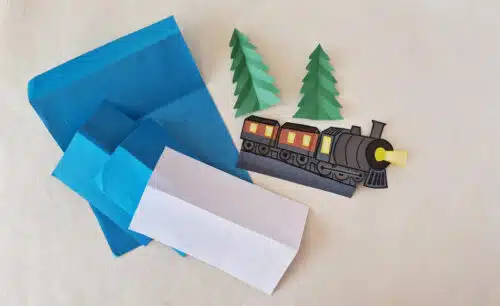
Step 18
Gather all the paper items for the diorama.
Step 19
Cover the inner surface of the diorama box with blue paper and then arrange the items in the box as you like. Use clear tape to attach a small piece of fluffy cotton to the top end of the front chimney to make it look like real smoke!
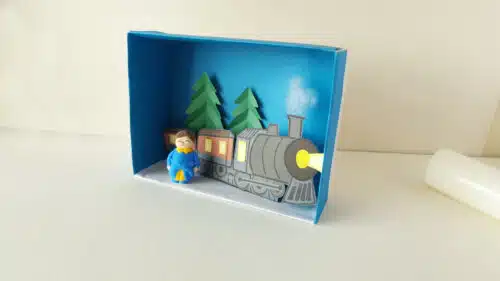
Step 20
The Polar Express is now complete, but you can still add other elements from the story that are your favorite! We have a clay figurine in ours modeled after the main character, but you may want to decorate your box with the wolves from the story, the elves in the North Pole, Santa Claus, or snow! You can even switch out your additions and practice retelling the story.
We hope our The Polar Express mini-unit study and diorama craft inspire your family to explore the magic of this timeless story. By combining literature with creative and hands-on activities, you’re fostering not just a love for reading but also a sense of wonder and imagination that will last a lifetime.

Christmas Blessing Giveaway
I’m teaming up with some dear blogger friends this year to bring you something truly special… our Christmas Blessings Giveaway. I know the holidays can be a beautiful mix of joy and chaos, and we hope to lift a little of that weight for a few families.
We’re giving away FOUR $250 gift cards, and the sweetest part? Each winner gets to choose where their gift card comes from. Whether you need a boost for gifts, groceries, or even a little something just for you, I hope it adds a spark of peace and encouragement to your Holiday season.
The giveaway runs from November 19th through November 28th, so make sure you get your entries in before it closes!
To enter, just use the form below. Yes… it’s a long one. But every single creator below contributed personally to make this giveaway happen, and your support truly means the world to us. And besides, the more entries you complete, the better your chances of snagging one of those $250 blessings!
Wishing you a season full of peace, joy, and blessings!
What is your family’s favorite book to read this time of year? How do you make the experience extra magical?
Check out our other storytime dioramas!
Stellaluna Diorama and Mini Unit Study